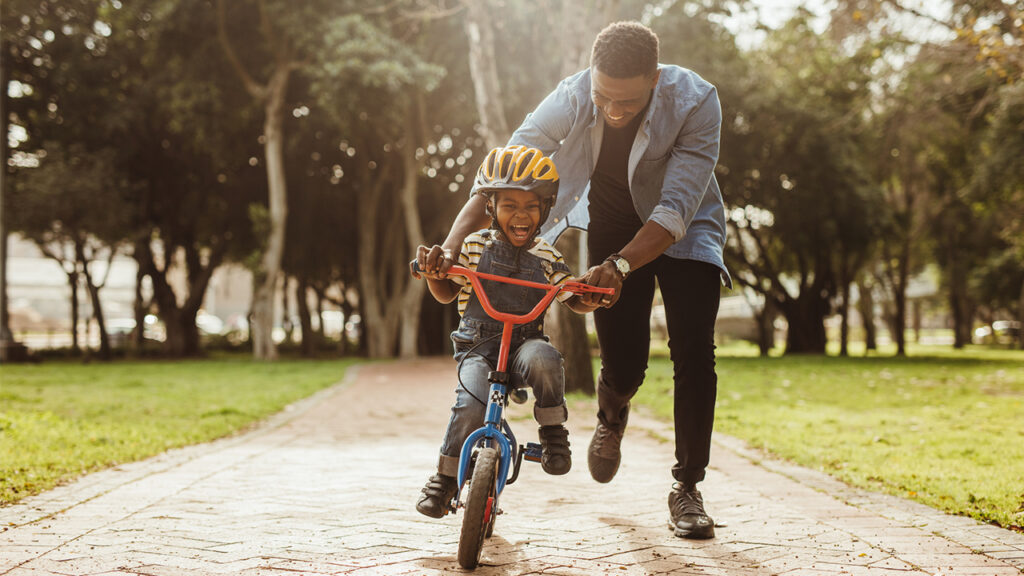
Welcome to the Topic “how to help a child to ride a bike”
Are you trying to figure out how to educate your child to ride a bicycle? It doesn’t matter if your child has never been on a bike before, if they are ready to stop using training wheels, or if they are having trouble making the transition from a balancing bike to a pedal bike; there is an easy and stress-free approach that you can use to teach your child how to ride a bike! It does not require the use of training wheels, nor does it require you to run behind the instructor while clinging to the saddle of the bicycle.
Some children require assistance with the entire procedure, while others (often those who have already mastered the balancing bike) require assistance solely in comprehending how to peddle ahead. These are two distinct issues, each with its own unique approach to resolution!
Teaching Your Kid to Ride a Bike Can Be Easy!
If your youngster has never ridden a bike before, don’t worry; it won’t take long for them to get the hang of it. I’ll let you in on a little secret: all you have to do to convert your child’s bike into a balancing bike is remove the pedals.
A youngster can use this straightforward strategy to concentrate on developing the ability to maintain balance while riding a bicycle, which is the skill that is considered to be the most essential in the learning process. A child can pick up pedaling at a later age… BEGIN WITH BALANCE!
Consequently, removing the pedals from your child’s bike so that they may concentrate on balancing rather than pedaling is the quickest, easiest, and most efficient approach to teaching your child how to ride a bike.
Although it is most effective for bicycles with 16-inch wheels or larger, the “take the pedals off” method can be applied to bicycles of any size. Suppose your child is currently riding a 12″ or 14″ pedal bike. You might want to think about purchasing a balance bike for them instead (there are several wonderful balance bike alternatives available for less than $100), but this method is still quite effective.
Getting Started – Suggestions for Success
Even though converting a pedal bike into a balance bike is a straightforward procedure, there are a few important things you should be aware of before getting started. The following four pieces of guidance will guarantee that the procedure goes as smoothly and joyfully as possible.
- A child’s soles of their feet, when flattened, should be able to make contact with the ground while they are seated on the saddle. Because of this, they will be able to push off the ground to build motion, as well as stop and start the bike on their own while being safe.
- LOW SADDLE: This technique will be more challenging for a child who is unable to reach the ground even when they are standing on their toes. You might try removing the rear reflector that is attached to the seat post if the saddle is not positioned low enough.
- LIGHTWEIGHT If the bike is lightweight, then following this strategy will be much simpler. Authentic balancing bikes typically weigh less than 10 pounds. Learning to maintain your balance on a heavier pedal cycle is more challenging. If the bicycle that you have purchased for your child is on the heavier side, you might want to see if a friend can lend you one that is on the lighter side.
- PATIENCE!: Your child’s level of physical prowess, level of commitment, and level of self-assurance when confronted with challenges are going to have a significant impact on their level of success and how long it will take them to master a pedal cycle. If the child is confident and athletic, this strategy might take them less than ten minutes to complete, but if they are hesitant, it might take them weeks or even months.
How to Turn a Bike into a Temporary Balance Bike
Take off those pedals, and I’ll walk you through the steps of teaching your youngster how to ride their brand new “balance bike.”
STEP 1: Remove the Pedals
Even though this step isn’t strictly necessary, taking it will definitely make the process of learning a lot less difficult for your youngster. Remove both pedals from the crank arms of your child’s bicycle by loosening the bolts and holding them in place using a wrench. o make a note of, first and foremost, the following:
- The left and right pedals have their threading done in the opposite direction from one another. To loosen the threading on the right pedal, turn it in the opposite direction (counterclockwise). Turning the threading counterclockwise will loosen the left pedal, as it is threaded in reverse.
- Mark the pedals with an L and an R using a piece of tape so that you will be able to identify which one goes where when you need to put them back on. (The left foot is the left foot, and the right foot is the right foot.)
- In the event that you forget, there might be an L or an R written on the pedal somewhere. In the event that this is not the case, the left pedal will typically have some kind of indication on it, such as a line on the spindle or other marks. Both the word “left” and some lines can be seen on the spindle of the pedal that is located below.
STEP 2: Leave the Crank Arms
The removal of the crank arms is a step that, in an ideal world, would also be performed, but in practice, this is a challenging and oftentimes impossible task. When it comes to learning how to ride a bike, we’ve discovered that removing just the pedals is sufficient and that the crank arms, for the most part, won’t get in the way of your child’s legs.
Be aware that the distance between the pedals on a bike that costs less may be rather large if you purchase one of those bikes. Because of this, it will be difficult for your child to utilize it as a balance bike because it will force their legs to be split further apart than they would normally do when walking or running. The possibility of the crank arms of the bike colliding with their legs exists because the width of the bike varies.
STEP 3: Set the Seat Height Properly
When a child is sitting on the saddle of a bicycle, the seat should be adjusted so that the child’s feet are able to rest flat on the ground. Ideally, there should also be a tiny bend in the knee (if the seat can go that low). In the event that this cannot be done, remove the rear reflector so that the seat can be adjusted as low as feasible.
STEP 4: Sit and Walk
The first step in teaching a child how to ride a bike starts right here! Instruct your child to put all of their weight on the seat of the bicycle, and then have them walk the bike forward using their feet.
Keep in mind that your child needs to wear a bike helmet at all times while they are learning how to ride a bike. This is for their own protection.
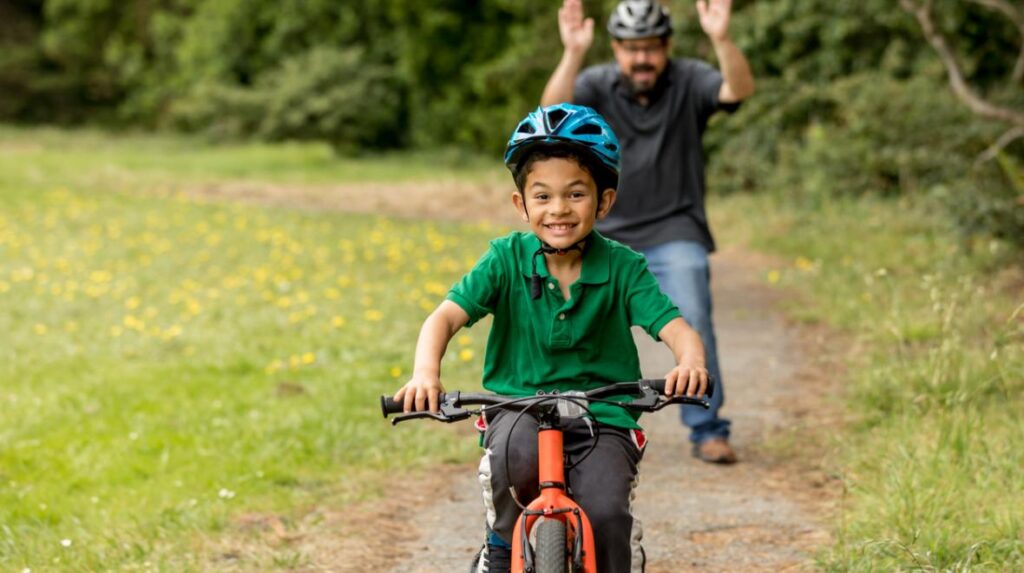
STEP 5: Sit, Run, and Glide
When the youngster has reached the point where they are comfortable gently walking on the bike, have them try running and then finally gliding while maintaining their balance. If they are having trouble grasping this concept, you might provide them a hand by giving them some momentum.
How? They may easily gather up speed and get a feel for gliding and maintaining balance by rolling down driveways or grassy slopes.
Your youngster will need to learn to balance and steer once they have mastered going in a straight line before moving on to more advanced skills. While they are gliding, your child should practice turning. They might roll down the hill and then make a short bend to either side before reaching the bottom. It is absolutely necessary to acquire the feel for how the handlebars react and learn how to steer the bike when turning when the bike is gliding. The vast majority of children pick it up naturally, but there are always a few who don’t, so make sure they practice.
Important: If your child’s bike just has a coaster brake and no handbrakes, the only way they will be able to stop the bike at this point is with their feet. This is the case if their bike only has a coaster brake.
STEP 6: Balance Mastery – Don’t Rush the Pedals!
Keep in mind that the objective of this activity is to teach a youngster how to maintain their balance when riding a bicycle. Do not put any pressure on them to put the pedals back on before they can clearly balance when moving over extended distances, and also spin the bike comfortably while gliding.
The task will be mastered by some children in as little as ten minutes, while others will require days or even weeks. Be patient and allow the youngster to continue using the bike as a balance bike for as long as they feel it is necessary!
A Child Who Can’t Pedal Forward
It is very normal for your toddler to struggle to understand the motion of pedaling at first. When it comes to most young children, it is actually more natural for them to pedal in the opposite direction rather than in the forward direction. It is not unusual for kids to get confused while learning to pedal, and as a result, they may pedal forward, then backward, and then forward once more.
Are you in the market for a bicycle for your child? Stop looking because the hero you’ve been looking for has arrived in the form of WudeBike. They are the most reliable bike provider because of their expertise in balance bikes, kid bikes, BMX bikes, and a few other types of bikes and parts. Check out their website for all the amazing options they have!
Have any questions regarding the topic “how to help a child to ride a bike” feel free to comment below.
Also Read: How much are toddler bikes